Here's my solution for achieving the three goals outlined in the question. I may edit this a bit as I find errors and where commenters declare confusion.
First, the caveats. Second, some info about relationships in CiviCRM. Third, building the view.
Caveats
I am writing this as a tutorial as if you are following along.
Obviously you won't have the same data to work with, but this will
work for any arrangement where you have multiple contacts who are
related by the same relationship type to a single organisation and
where that organisation is related to a third contact, e.g. a CEO, a
secretary, a captain, a fundraiser, via a second relationship type,
e.g. a sports team with players and a captain or a committee with
members and a chairman or a company with employees and a CEO.
We will use a contextual filter in the view, but I am not explaining
the guts of filters.
I'm sure there are modules other than Views required to make this
work, CiviCRM integration modules at the very least, but I can't
remember what they might be. If someone wants to track down all the
modules that are being used here and edit this post, that would be
brilliant.
I am also not going to get into formatting, but can later if people
are interested.
I am showing you how to rewrite the results of a field to create
your own custom link, but will not be going into detail. The
rewriting feature is how you would create links to the organisation
pages themselves from, say, a page where all the organisations are
listed in a table, but I am not going to take you through how that
would work.
The CiviCRM relationship alphabet
CiviCRM tracks relationships from two sides, Side A and Side B.
I am an 'Employee of' The University of New South Wales, Side A -> Side B.
The University of New South Wales is the 'Employer of' me, Side B -> Side A.
When you create a new relationship type in CiviCRM, you have the choice as to which side of the relationship is going to be A and which side B. For the relationship types that 'ship' with CiviCRM, the A side is the individual and the B side is the organisation or household, that is, the group.
You can see how it works at Administer->Customize Data and Screens->Relationship Types. Here's a snapshot of my set up. For the sake of the rest of this tutorial, note lines 2 and 5, 'Campus contact at' and 'Employee of'.
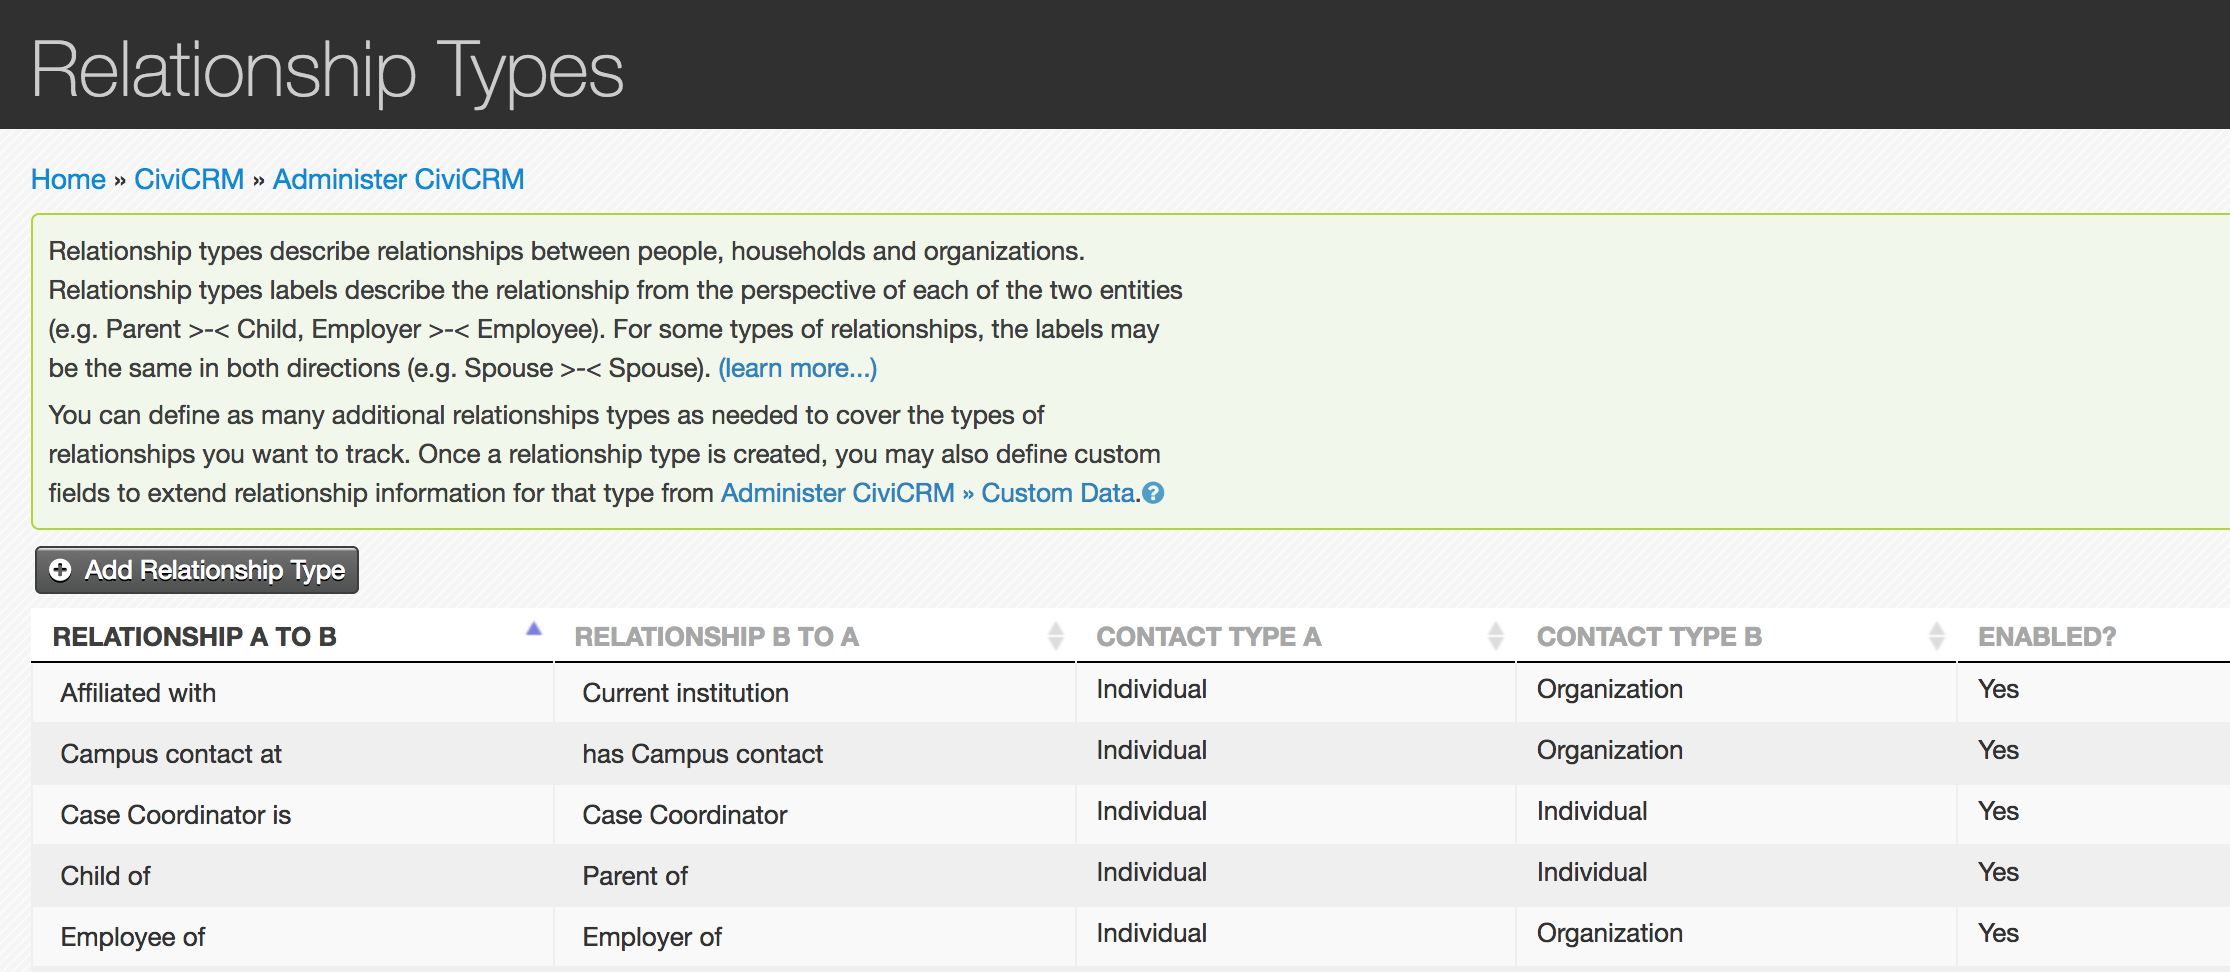
Individual (A) is 'Campus contact at' organisation (B), so this is a relationship starting from Contact A.
Organisation (B) 'has Campus contact' individual (A), so this is a relationship starting from Contact B.
While tedious in its repetition, this is the most important information to have firmly fixed in your head as you create your view.
Create whatever relationship types you need for your data structure and add relationships to contacts as required. I've created a few dummy contacts and will use a university where my mob don't have contacts in order to keep this anonymous.
Create your view
Create a new view - Show 'CiviCRM Contacts', 'Display format' doesn't really matter, but you want a list of 'Fields' of some description.
After saving the new view, open up the 'Advanced' column on the right hand side of the view display.
You will be adding several relationships and the order matters because context is king in views, i.e. one relationship creates a new context for the next, and knowing which B is related to which A is essential.
Click to 'Add' your first relationship. Check the box for 'CiviCRM Contacts: CiviCRM Relationship (starting from contact A)' and click Apply. That takes you to the field settings window.
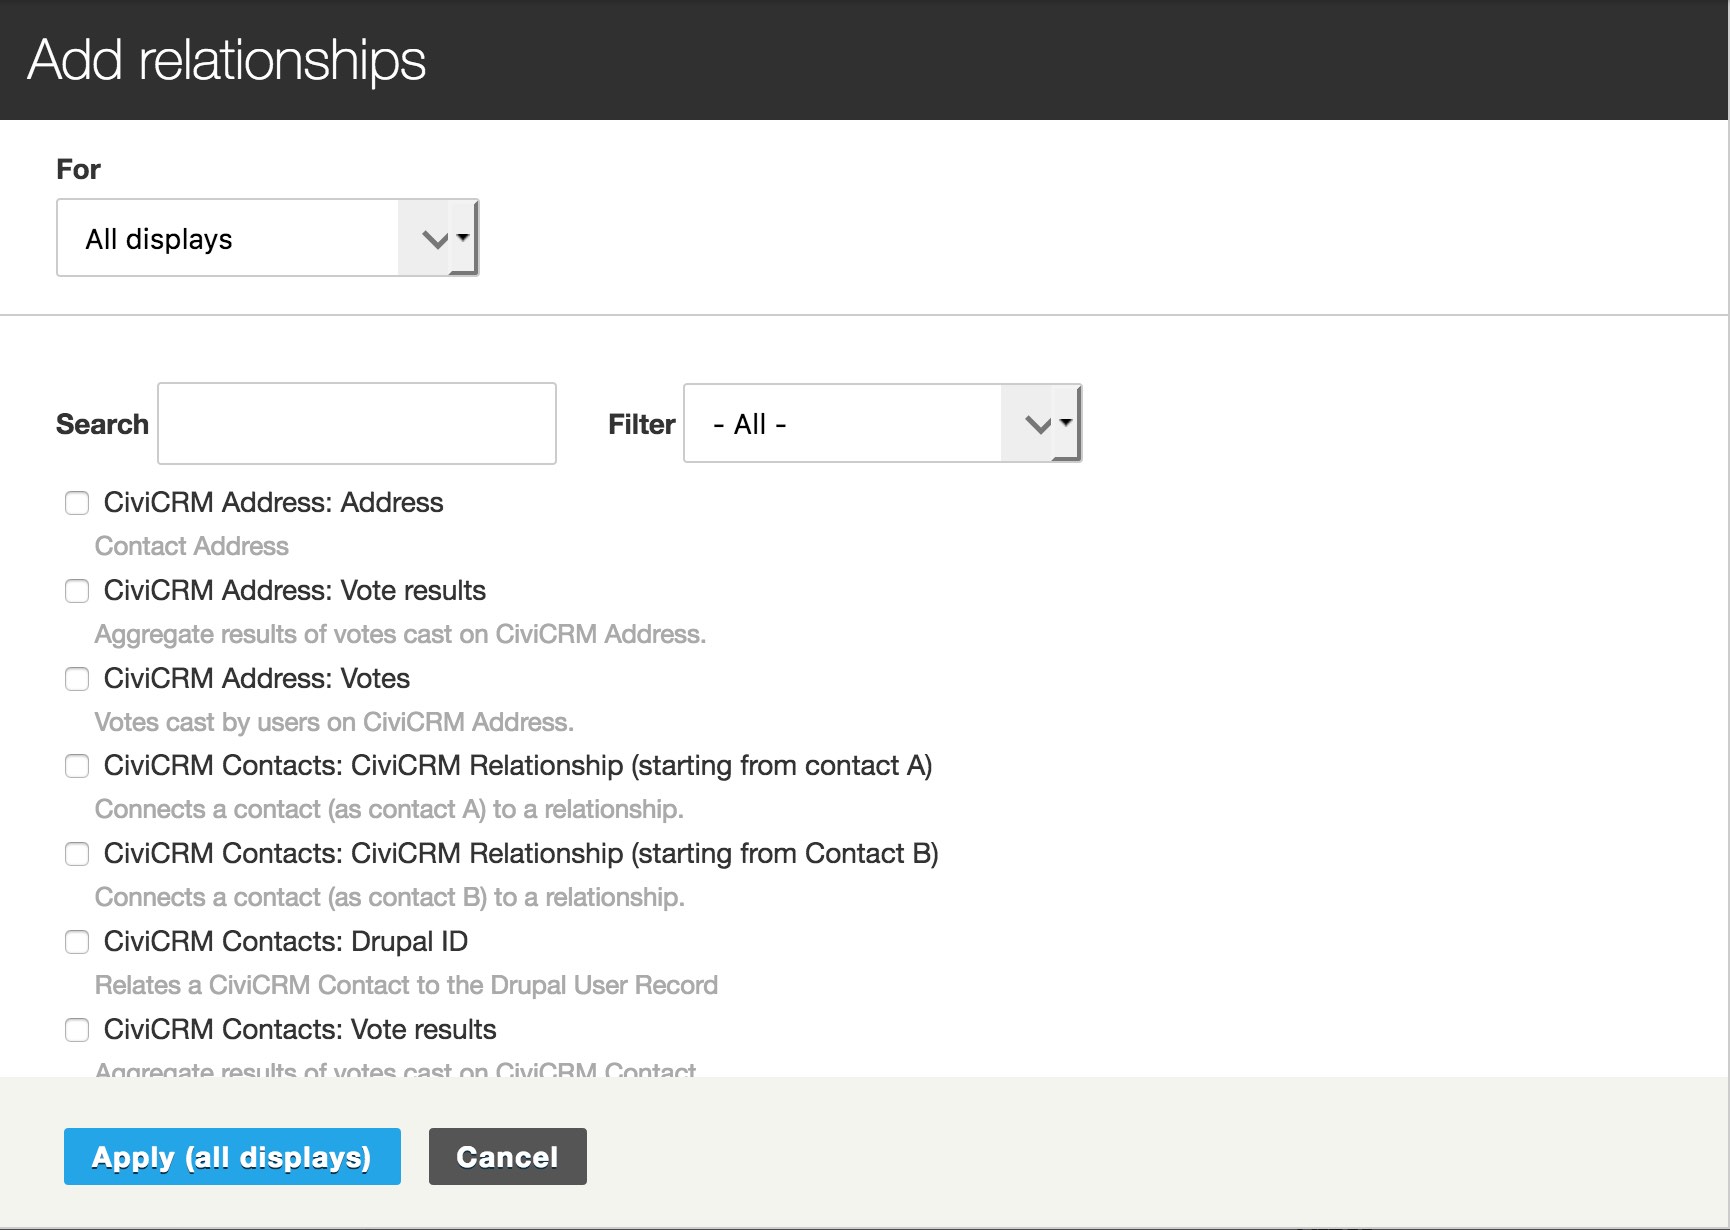
- In the 'Identifier' box, you'll see the name of the relationship you just selected. Click in the drop down for 'Choose a specific relationship type' and select the required relationship type. This defines the first two types of contacts that your view will be handling. For me, I will select 'Employee of|Employer of'. This gets me access to all employee data and all employer organisation data in my database, and allows me to accomplish the first two goals, display organisation fields and display a list of members (employees) of those organisations.
Now add some fields to the view. Let's add the employer display name and the display names of employees of that organisation. Click to Add a field. Type 'display' in the search box and select 'CiviCRM Contacts: Display Name'. Click Apply. You can leave the Configure Field box alone, so click Apply again.
If you look at the auto-preview at the bottom of the views interface, you are likely to see both individuals and organisations listed. Remember when you added the display name field, there was no way to indicate which side of the relationship you meant to display. We need to add another relationship.
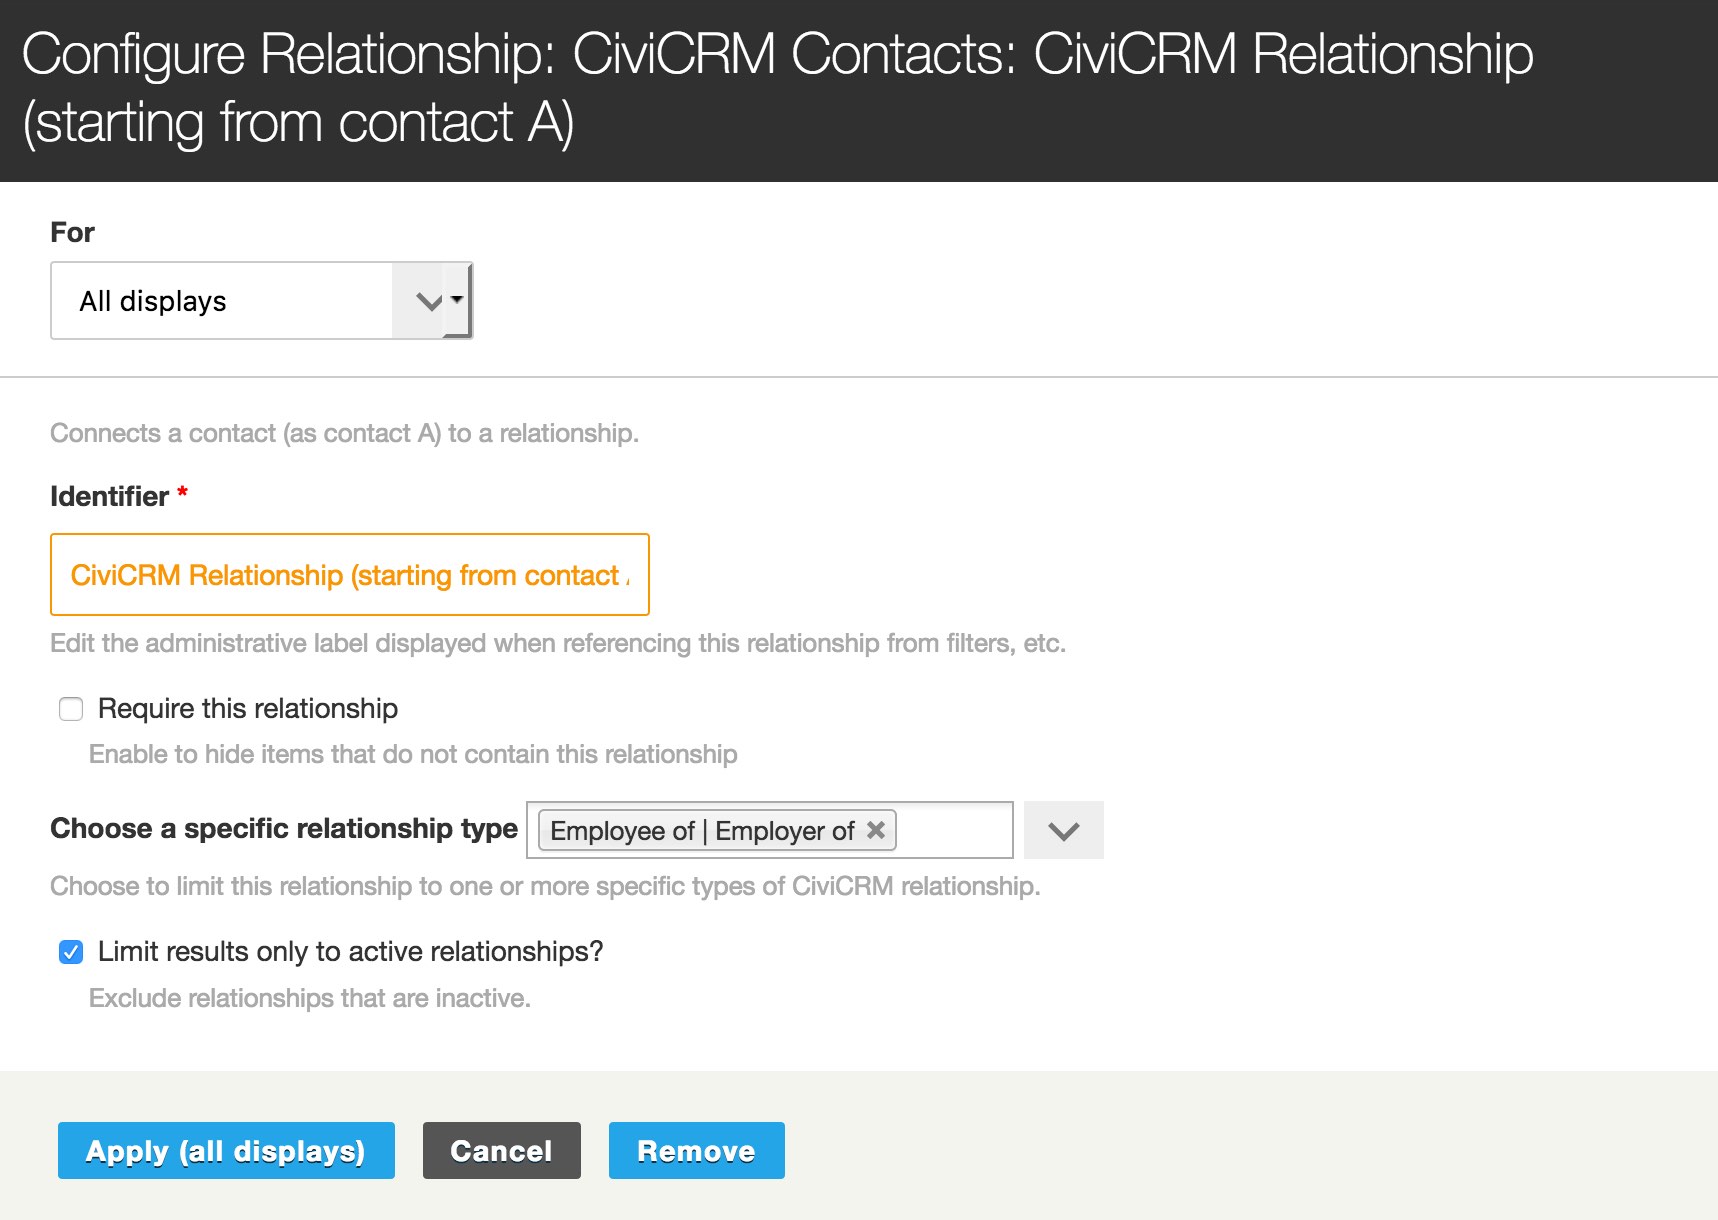
Add relationship. Type 'id b' in the search box and select the 'CiviCRM Relationships: Contact ID B' relationship. You may think we should now also add the data from Contact A; however, this is where the alphabet soup breaks down, but we'll explain that when we get to adding other fields later.
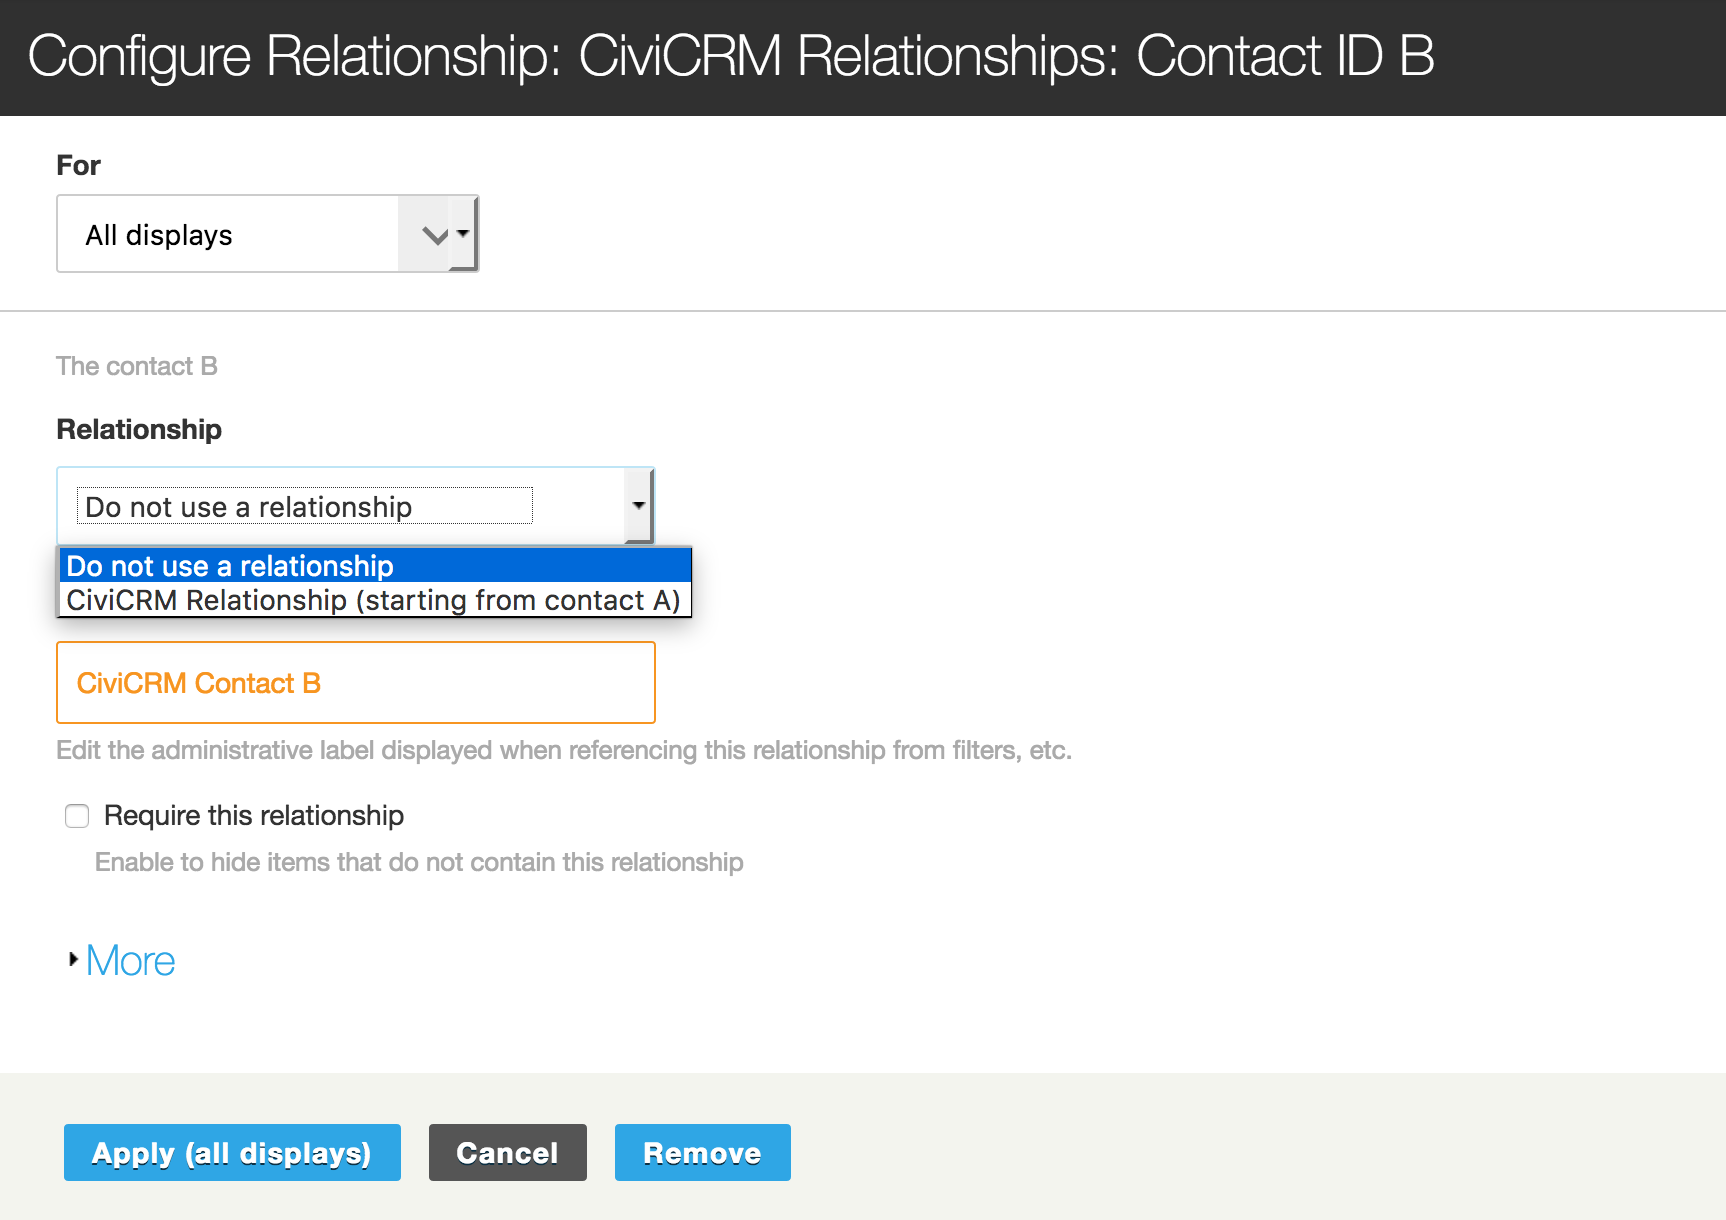
Click Apply to bring up the Configure field window. There is a new 'Relationship' option. Click the drop down and look at the options: 'Do not use a relationship' and 'CiviCRM Contacts: CiviCRM Relationship (starting from contact A)', which is the relationship you added earlier. Select that option in order to tell views that the Contact B data you want is from that particular relationship type, that is, employer organisations. Click Apply.
Now go back to Fields and click on the field you already added, display name. You will now see the same Relationship option in this window as in the previous configure relationship window a minute ago. Click the box and look at the options. You should see 'Do not use a relationship' and 'CiviCRM Contact B'. Select 'CiviCRM Contact B'. Click Apply.
Now look at the auto preview. You should see a list of employers only because you have told views that the display name you want to display is that of Contact B from the relationship starting from Contact A defined as an Employee/Employer relationship.
Add another field. Add display name again, but this time select the 'Do not use a relationship' option for Relationship. Click Apply. You might expect we should be choosing the display name of Contact A of the relationship we set up earlier, but views takes Contact A of the first relationship you create to be the default Contact for the view, so when you want to display fields from that contact, views says you are not using a relationship. That is, that data is treated as the data views would display, if you had never set up a relationship in the first place. From now on, displaying employee data will mean choosing 'Do not use a relationship'.
Check the preview. Things will likely look rather messy because views is displaying all employer names and all employee names in no particular order or grouping. Don't fret. We need to add a Contextual Filter to help views make sense of what we want. Remember, I am creating a landing page for an organisation, so I want to see data from one org per page, but with all the employees listed for that org.
Add a Contextual Filter. These filters will be arguments in the url for the page. In this case, we need to tell the view which org page we want to see, so the url might be http://example.com/employers/9728, where employers is the path to the view and 9728 is the Contact ID of a particular employer. The filter interprets the number it finds in the url as a field of one of your contacts. When the url is parsed, we want that number to be understood as the Contact ID of a CiviCRM employer organisation.
In the 'Add contextual filters' window, select the 'CiviCRM Contacts: Contact ID' option and click Apply.
In the configure field window, select 'CiviCRM Contact B' for Relationship. Click Apply. That will mean the argument in the url is now interpreted as the Contact ID of an employer organisation.
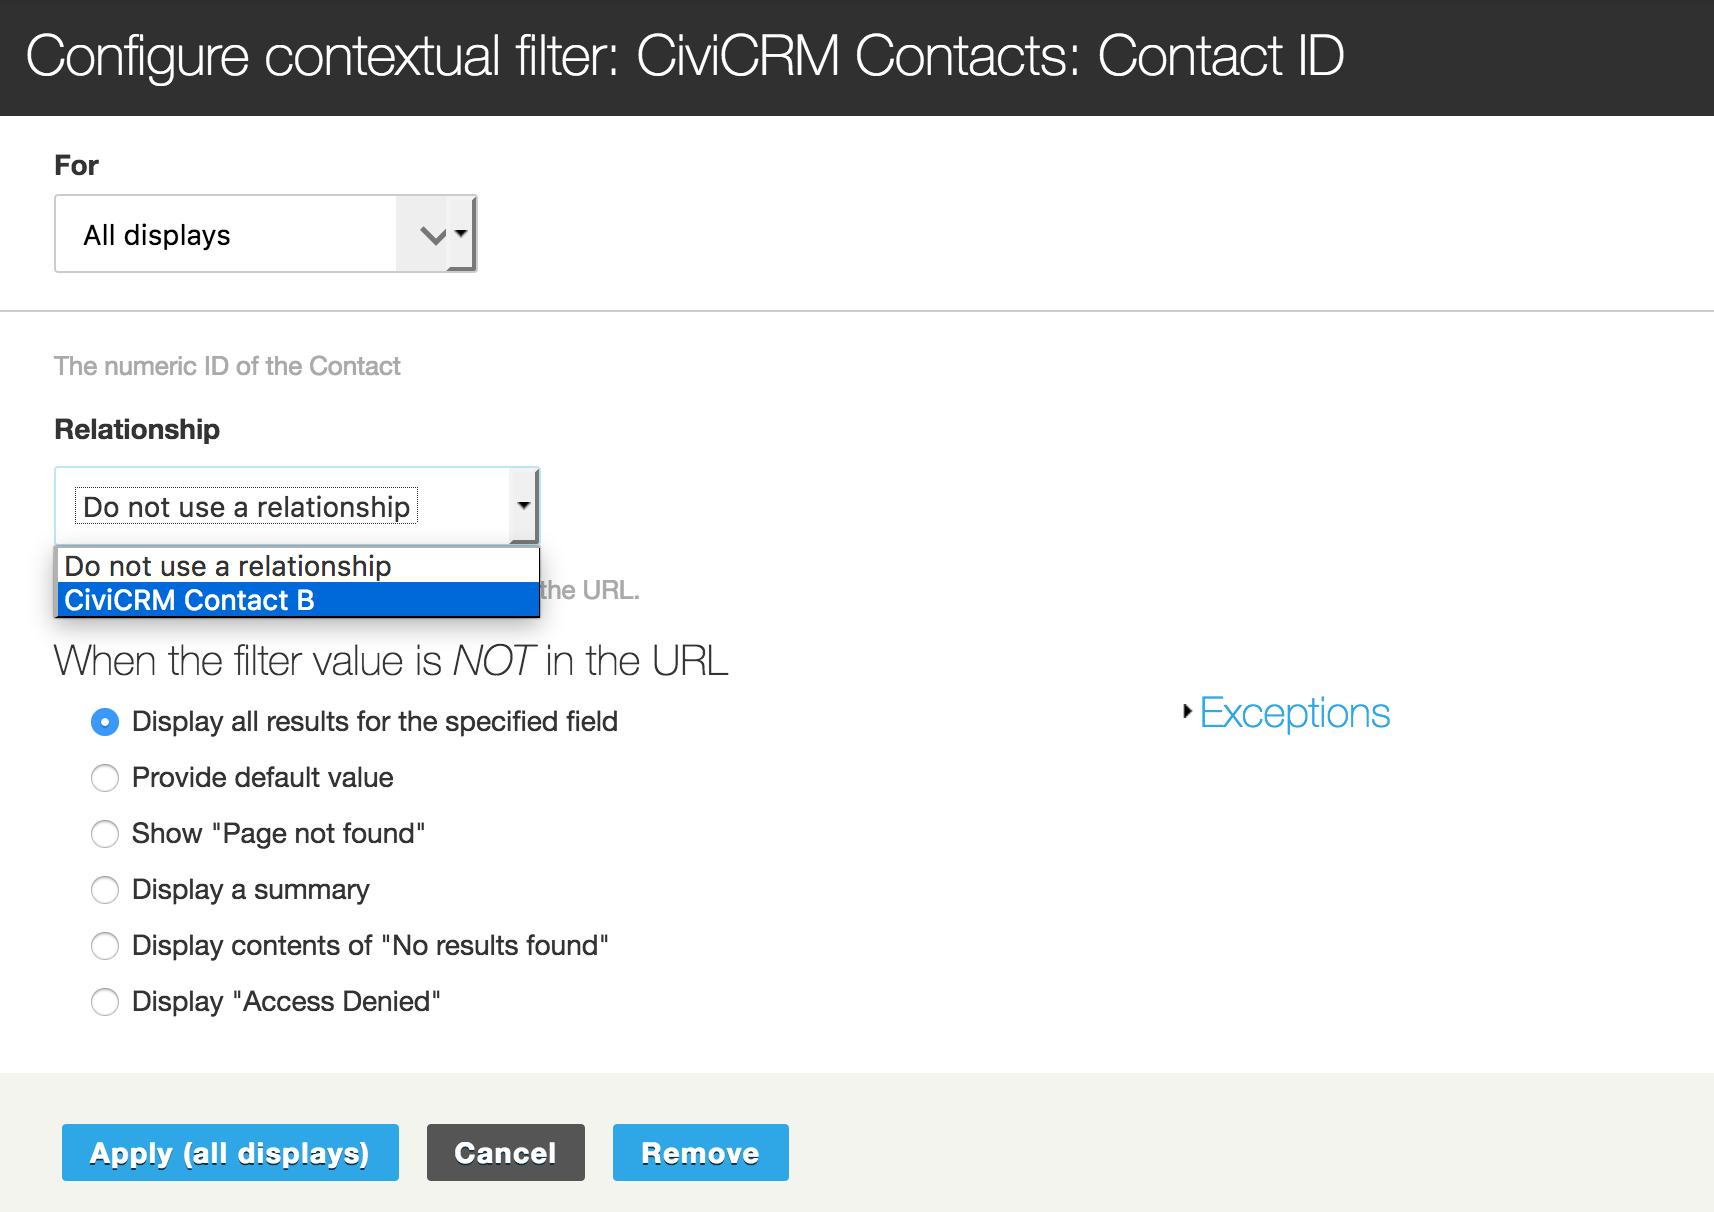
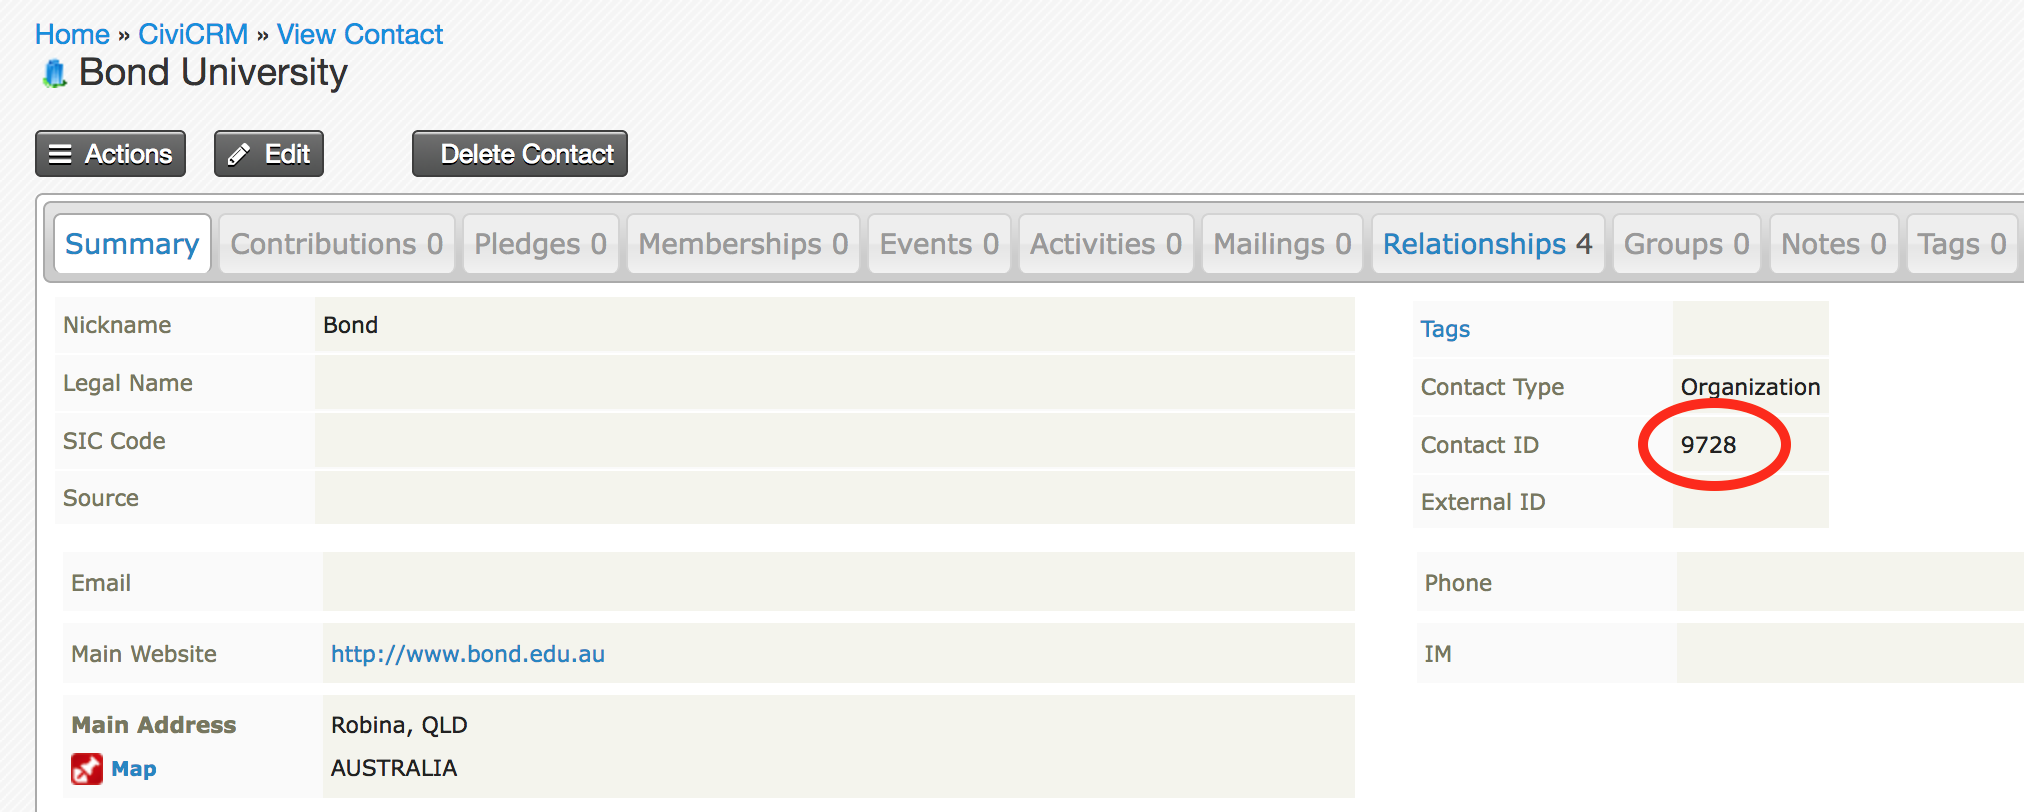
- Before checking the results in the preview, go into Civi and find a Contact ID number of one of your employer organisations to use for the filter. Then enter that number in the box 'Preview with contextual filters' and click Update preview. I am using Bond University which has Contact ID 9728.
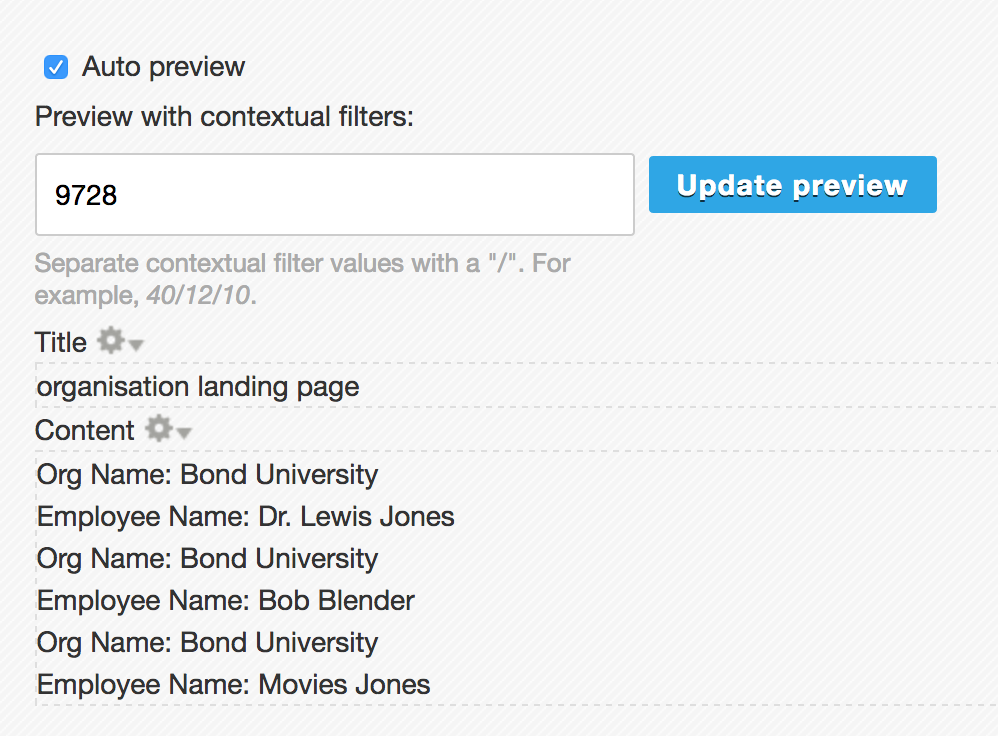
- The preview should now have org names alternating with employee names (I've changed the labels to make it easy to see). The org names should all be the org with contact id you entered into the filter and the employees should all be from that org. Obviously, this isn't the way you would display the page, but we are just trying to make the data available, not format anything.
We've accomplished goals 1 and 2 and tidied up the output with a filter to display data from only one organisation per page. All the concepts are in place and we just need to get the third contact involved, the Campus contact. Campus contact is related to our existing Contact B in the same kind of relationship as employee to employer and you could imagine we would create another A->B relationship where A is defined as the Campus contact. Here's where I plead ignorance! It doesn't work and I'm not 100% sure why, but it may be some kind of confusion with the fact that it already has an A and B related in the same way and can't make sense of the query. Don't know about that, but I do know how to make it work in an equally intuitive fashion.
Add relationship. Select 'CiviCRM Contacts: CiviCRM Relationship (starting from Contact B)' and click Apply.
Select relationship 'CiviCRM Contact B' to ensure views knows you want to use the existing Contact B as the basis for the new relationship.
Choose the 'Campus contact at|has Campus contact' relationship type. Click Apply.
We know from the previous work that in order to be able to access data from the Campus contact, we will need to add a relationship to that contact, which is now defined as Contact A in our new relationship.
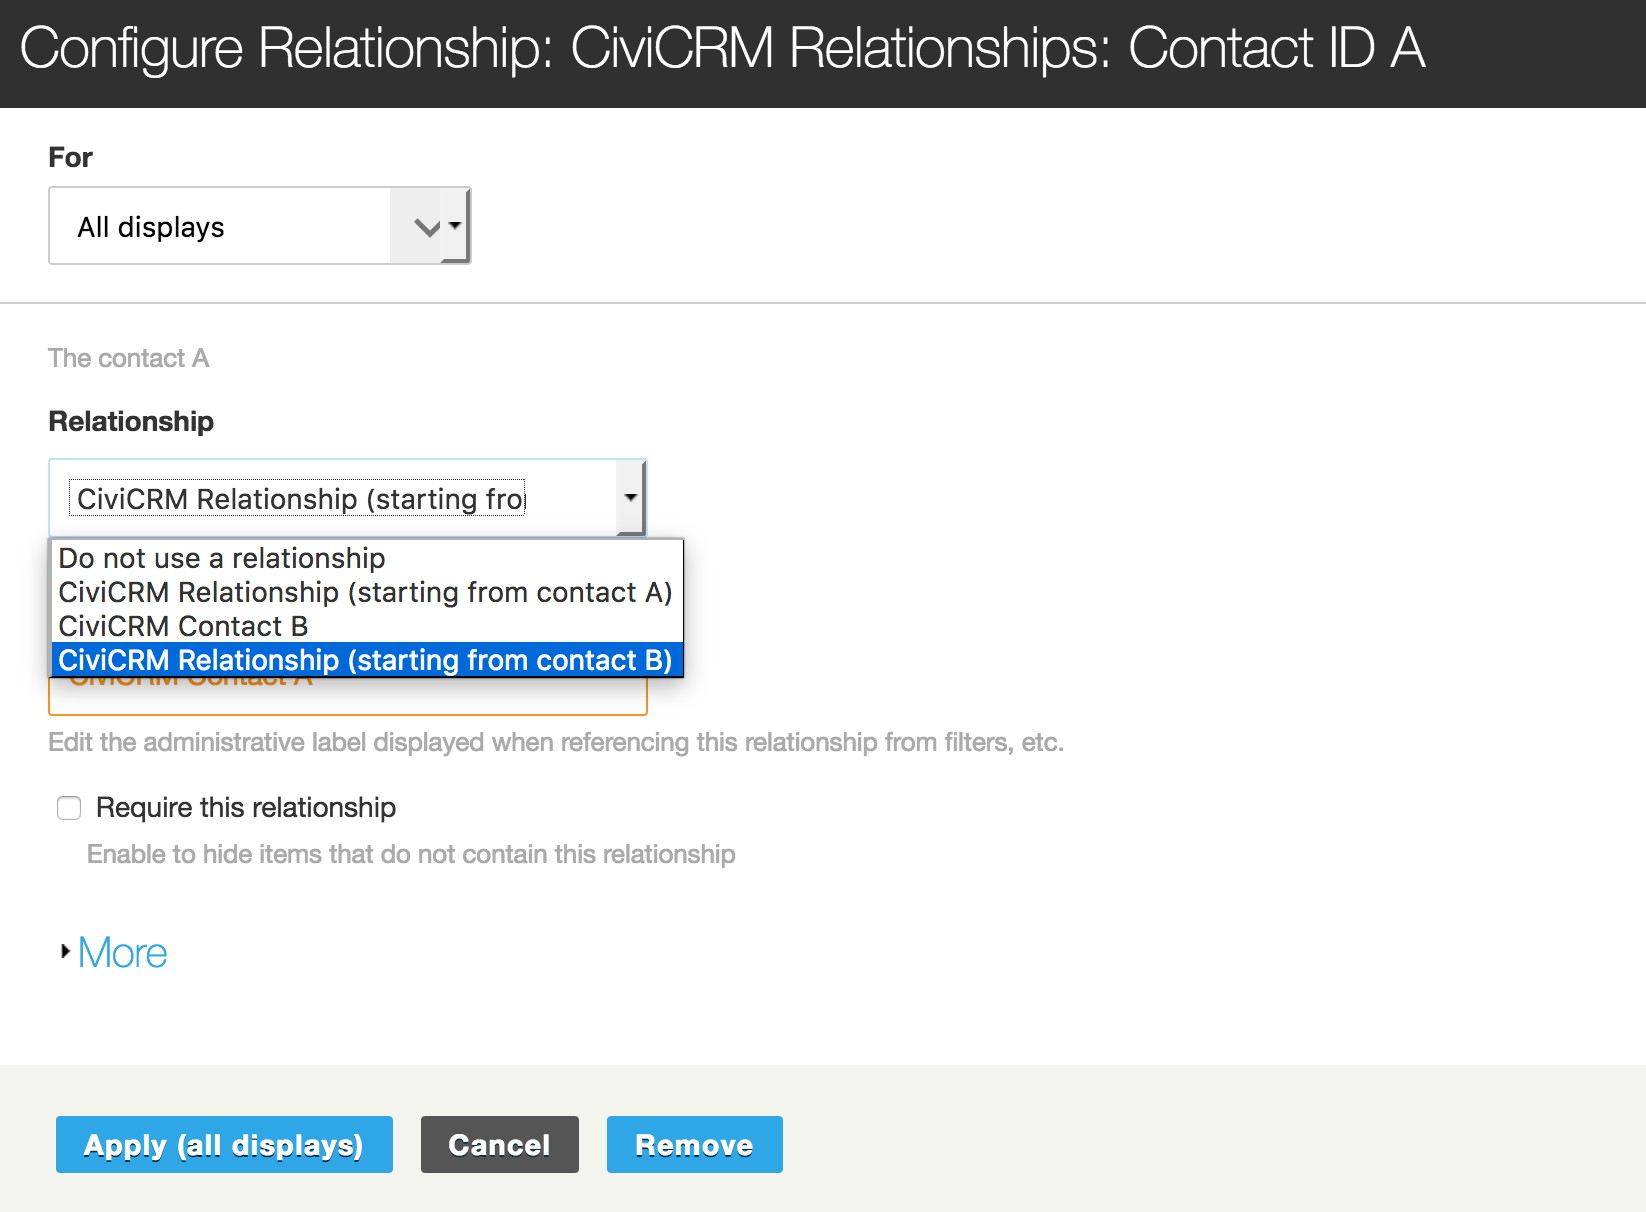
Add relationship. Check 'CiviCRM Relationships: Contact ID A'. Click Apply.
In the configure relationship window select 'CiviCRM Contacts: CiviCRM Relationship (starting from Contact B)' as the relationship, so that Contact A will now be the Campus contact. That should be the end of adding relationships for my purposes.
- Add a field. Add display name a third time, but select CiviCRM Contact A as the relationship. Check out your preview. You should see three lines for each employee: org name, employee name, and campus contact, and the org name and campus contact should be the same for each different employee.
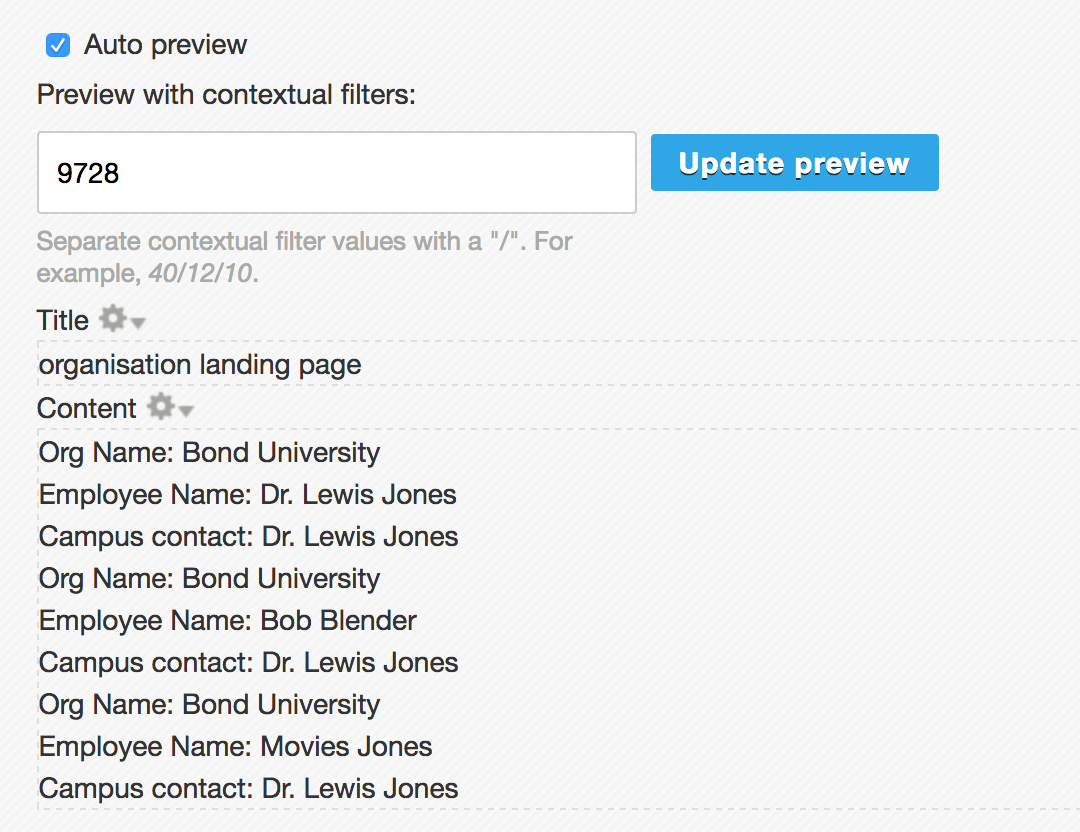
We now have access to data from three different contacts in the one view. Congratulations! The last item is to link my campus contact field to the Drupal contact form for that user. Child's play compared to what you've just been through!
Add a field. Add the 'CiviCRM Contacts: Drupal ID' field and click apply.
I want the Drupal ID of CiviCRM Contact A, so select that relationship and click Apply.
Learning moment. Back in the Views control panel click to edit the display name field for Campus contact.
We need to rewrite the output of that field to make it a link to the contact form. For that we need access to the Drupal token [drupal_id], so that we can create the url user/[drupal_id]/contact.
Scroll down and expand the 'Rewrite results' section. Scroll down again to 'Replacement patterns' and expand that section. You will see several tokens for display name, but no Drupal ID. What those tokens have in common is that they are for fields above the Campus contact field in the field list.
Context is king in views. We need to move the Drupal ID field up in the list until it is above where we want to use it, so anywhere above the Campus contact field.
Click the arrow next to the Add field button and move the Drupal ID above the Campus contact field. Apply.
We don't need to display the Drupal ID either, so I would edit that field and check the Exclude from display box.
Edit the Campus contact field again. Look at the replacement patterns under rewrite results and you should see [drupal_id] as an available token.
Scroll back up and check the 'Rewrite the output of this field' box and the 'Output this field as a link' box.
In the link path input, type user/[drupal_id]/contact. Apply those changes.
Now gaze in wonder at your preview. The Campus contact field is now a link.
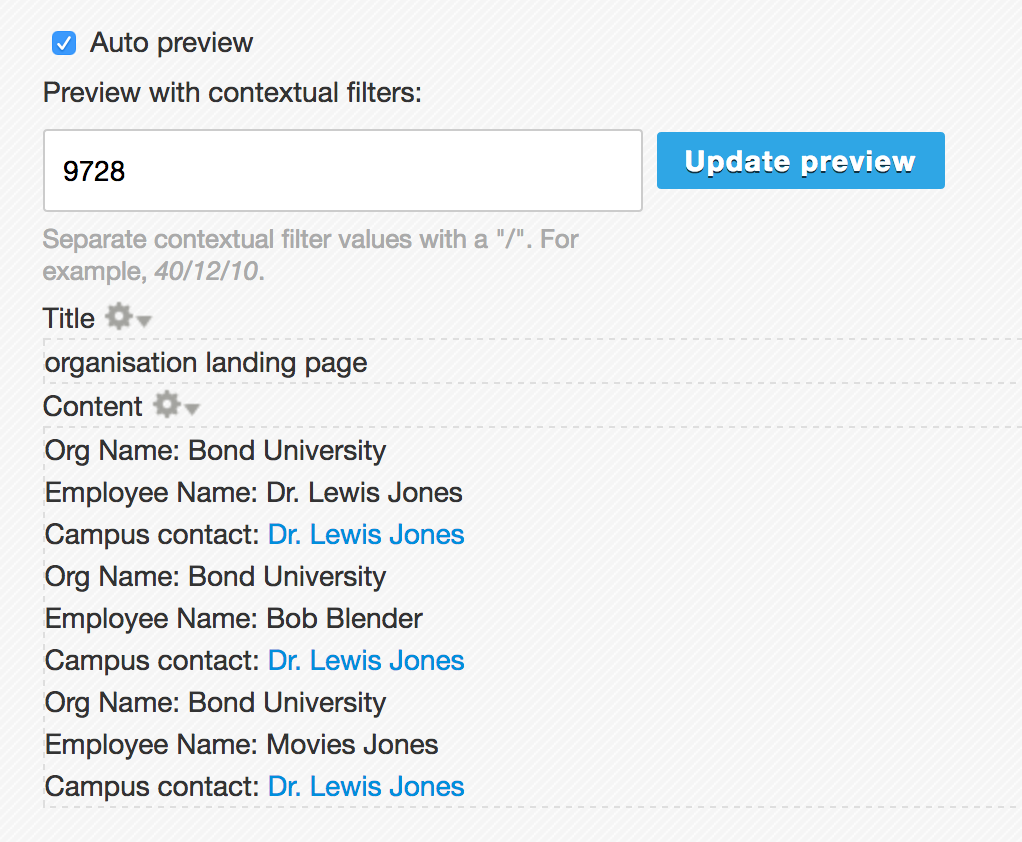
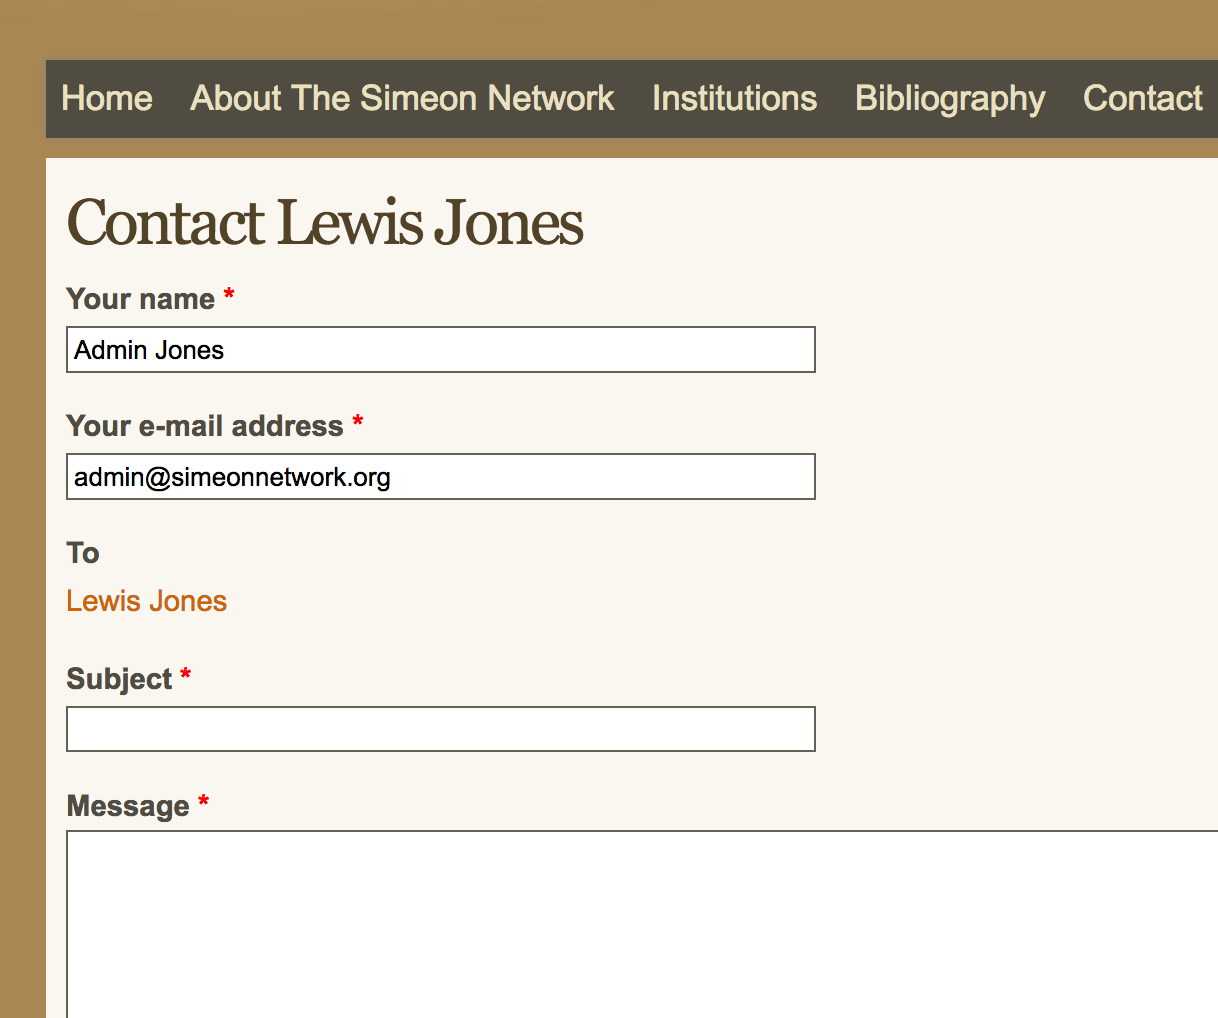
- Click the link and, if you have the contact module turned on, it should take you somewhere like this. We've achieved all three goals! Well done.
If you would like me to add some more about how to do some quick and dirty formatting for this kind of view/page, just ask, but I can't do it now.
I hope this has been helpful.


